
HM 32" EPP Edge 540 V4.1 Review
Upon opening the box, I was greeted with an absolutely beautiful model. The printing and colors present on the scheme is incredible. Super vibrant and high visibility colors. Lots of carbon for rigidity and the foam was of excellent quality. So as with all Twisted Hobbys planes, they are of great quality. Everything fit perfectly with zero trimming of foam required...as expected
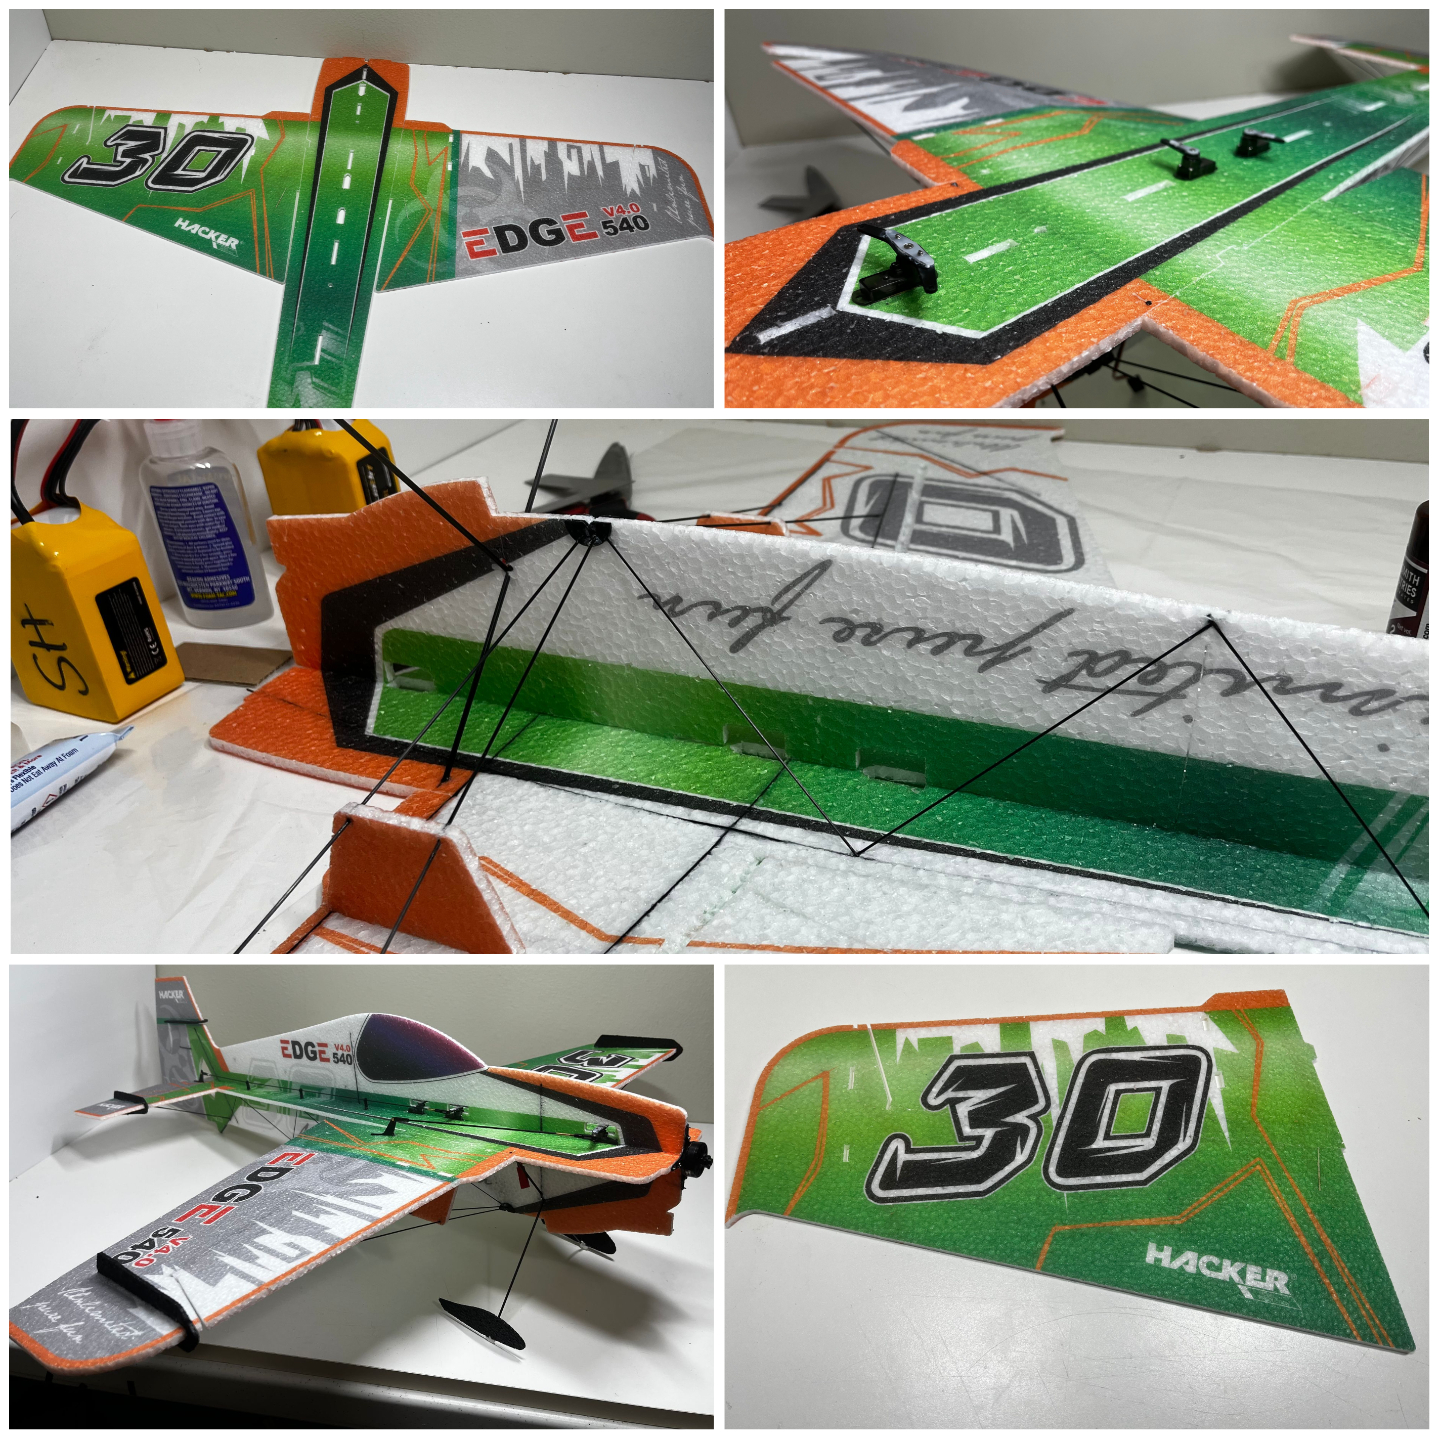
Build: The build was very straight forward and quite easy. As with any profile 3D foamy, always start with folding over and weighing down the hinges for a few hours to help break them in. While the hinges were breaking in, I took the free moment to get all my servos centered and the arms setup. Super easy to do so. After the hinges broke in, I dry fitted and tested everything before glue, so once I confirmed all the parts fit well, glue was added. As for glueing, the wings and stabilizer get glued to the horizontal fuse with Foam Tac then all the carbon gets installed in the pre-cut slots and glued with thin CA. I installed the plastic wing strut joiner piece to the fuse before glueing to the horizontal fuse to make it easier to get it inline on the fuse. Once the CA and Foam Tac have cured, the lower vertical fuse gets installed with Foam Tac. Make sure this gets glued 90 degrees perpendicular to horizontal fuse After this, you can install the carbon bracing. This is the last chance to make the lower vertical fuse perpendicular. I go over it every few inches on both sides of the vertical fuse with a miniature triangle square to make sure its straight. Once I verify that it is straight, every carbon piece will get a dot of CA at the foam to secure it in place. I also installed the foam wing strut support pieces, carbon wing struts, and main landing gear rods at this point as well. I weighed my wing down with batteries to get it flat and once I liked the look of the placement of the carbon, it also got a bit of CA.
At this point I installed my servos. Aileron servo gets installed with the servo output shaft towards the tail of the aircraft with the servo arm angled towards the front. The rudder and elevator servos get installed with the output shafts towards the nose of the aircraft. Under each servo tab, I put a drop of Foam Tac to secure the servo to the plane. I installed the vertical flat carbon supports before the top vertical fuse. While you can get them in, it is a good bit harder to do so. However no glue is added until I put the top fuse on. Same process for the top fuse. Test fit, glue, make sure its perpendicular. Once this is installed, I made sure the carbon pieces were all seated properly and all the way into the slots on both pieces. Again once it's set, hit it with glue. This completes the main structure of the airframe. Now we can install the sfgs, and wheel skids. The wheel pants glue right onto the skids and the skids get glued on to the round carbon rod gear. Linkages are pretty straight forward, with the servo centered and on, I add a bit of glue into the clevis and install it on to the pushrod. Do this on all four pushrods. Finally do the the other end of the pushrod which goes into the threaded brass coupler. All surfaces get a drop of glue on the pushrods when inserted into the coupler once the surfaces are straight and in the neutral position. The carbon fiber motor mount gets glued on now. I scuffed mine up (side that gets glued) with some 120grit sand paper to aid in glue adhesion, and I used foam tac to secure the motor mount. The final two carbon rods get installed through the very outside motor mount holes to keep the mount from twisting off, and I glued these with a drop or two of CA. By this point, not much is left other than to add some velcro to the battery, receiver and esc, and then to toss her in the air for a maiden. For full build photos visit this link
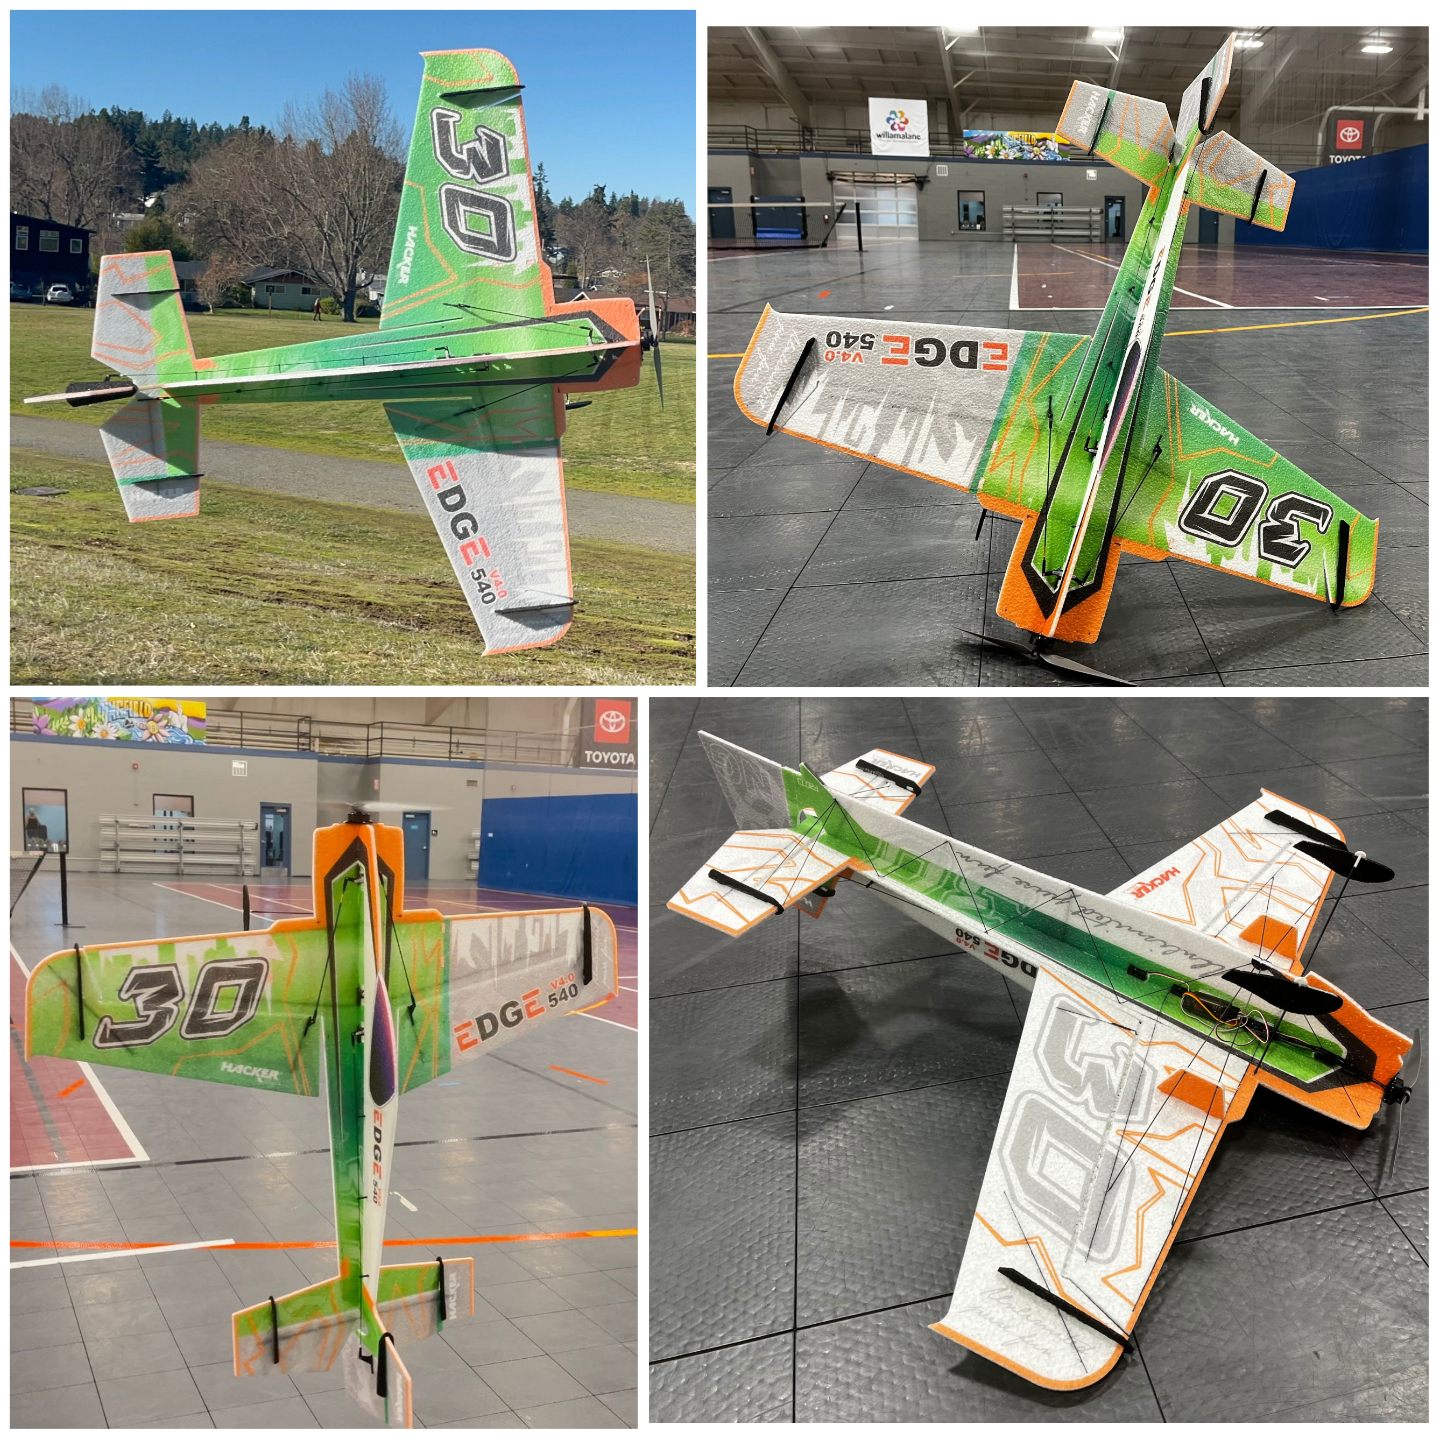
Flight Testing: For the maiden, I used my 2s 450s, and I had planned on taking it easy, however after my first lap in the gym, I instantly felt at home flying the Super Lite Edge. Flys really quite incredible. It can fly very slow and do precision flight incredibly well, while also flying wild 3D and faster precision too with zero changes in setup. Slow point rolls and slow rolls are easily achievable with little coupling. Upright and inverted flat turns are insanely flat even without added aileron. Knife Edge is very stable and straight. Harriers are as expected and are smooth and straight. Hovers and torque rolls are super straight and locked in. Torque rolls almost hands off! The roll rate is also quite respectable and axial leading to straight and level rifle rolls and rolling harriers. Positive and negative snaps are very crisp and it just locks right into it. It just does everything very well and I am very happy with it. I am sure as I get more packs through it, I will love it more and more and it is quickly becoming one of my favorite mid-wing 3D profile monoplanes out there. In my opinion, it is an insanely underrated airframe and I believe everyone needs one of these in their hangars. I look forward to flying it more and more now. Until next time, Sam
Product: Link
Recent Posts
-

Crack Yak-55 XL first build!
What do you get when you feed the popular Crack Yak after midnight? The all new Crack Yak 55 XL with …Mar 22nd 2025 -

How to Set Center of Gravity on Twisted Hobbys Rc Airplanes
A very common question we are asked of our newer pilots is how to adjust the CG on their rc airplane …Mar 22nd 2025 -

Crack Pitts XL Blog
Chris Doerr dives into this Crack Pitts XL model by Twisted Hobbys.Mar 22nd 2025